A friend of mine asked for my help to make a great idea come to life – to take all her new boy’s 0 – 3 month baby clothes and make them into a patchwork blanket. It meant she got to have in everyday view and keep all the lovely clothes from those first few precious months. Many of them were presents and lots featured in his first photographs so they had lots of sentimental value.
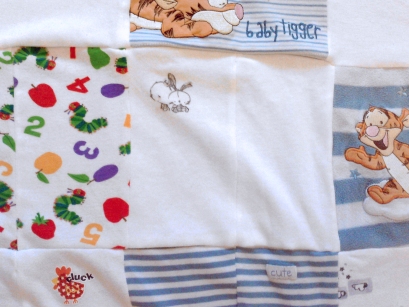
Step 1 (cutting) – We started by making two 6″ / 15cm square paper templates. We measured this was the right size to cover the body section on all the clothes. Some really small baby grows, tops and trousers only made half squares, so we placed them side by side to make full patches. This photo shows a few of the half squares sewn together – the middle patch was a small baby grow and the The Very Hungry Caterpillar fabric is from a pair of trousers, one small leg for each half square.
After we had cut up all the clothes into squares (around a washing basket or large carrier bag full) we laid them all out on the floor and rearranged them. We moved them around to try and get it symmetrical, the colours spread out evenly and the pictures mixed up. The 5 x 8 setup of patches worked out to the perfect size for a child’s bed throw. We did have to cut a few extra squares from the plain backs of the clothes to fill in the last few spaces.
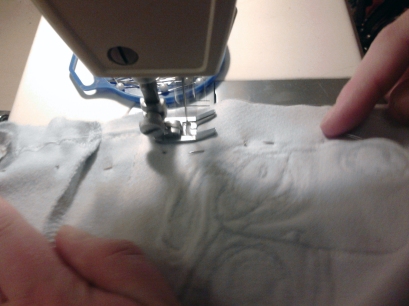
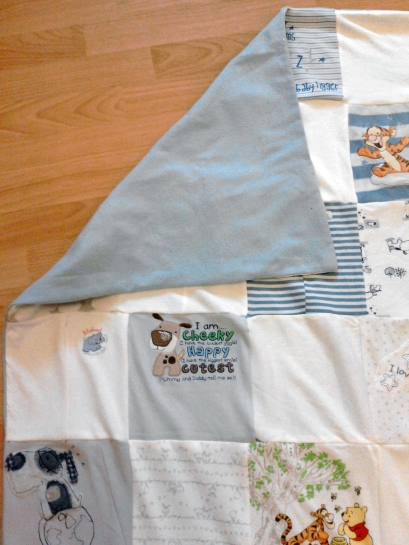
Step 2 (pinning & sewing) – Sewing and pinning all the pieces together we did as a team – I did the sewing and my friend pinning and unpinning. She pinned each row of 5 squares together, gave it me to sew, back to her to unpin, until we had all 8 rows complete. Then we joined two rows, then four, then all eight.
The different types, stretch and weights of material did make it a bit tricky. I adjusted the height and pressure of the sewing machine foot to cater for this. Most of the sewing I did as a simple straight stitch but for the delicate and easily fraying fabrics, I also added a zigzag stitch close to the cut edge. I used the very outside guide (2cm / 3/4″) on my sewing machine base plate to get all the seams even and as straight possible.
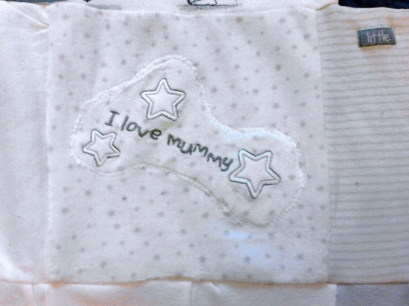
 If the clothes had a cool picture on that did not fit in the square we cut it out, pinned and stitched it onto a plain square. How could we not include this “I love mummy” on the blanket?! All the hard work we put in, the little man better love his mummy very much when he is warm and snug at night!
Step 3 (lining) – When it was all stitched together, it looked fabulous – now time to add the lining. I had found an old soft blue thick sheet and we laid this on the floor, with the patchwork on top upside down (all the seams and stitching face up). A good tip for getting everything straight is to ironed all the material flat first. We used the squareness of the shop bought sheet as a guide and cut out both the sheet and patchwork to the final size. Only a few inches of the patchwork was cut down to make it straight.
We pinned the blue lining onto the patchwork and then stitch all the way around. But remembered to leave one side of the very last square unstitched. I did a straight and zigzag stitch hem to affix the lining, to make sure the final blanket was strong and ready to be tugged about by a small boy. We then turned it inside out via the open square, so that all the stitching was hidden. Then hand stitched the final open side, to complete our work.
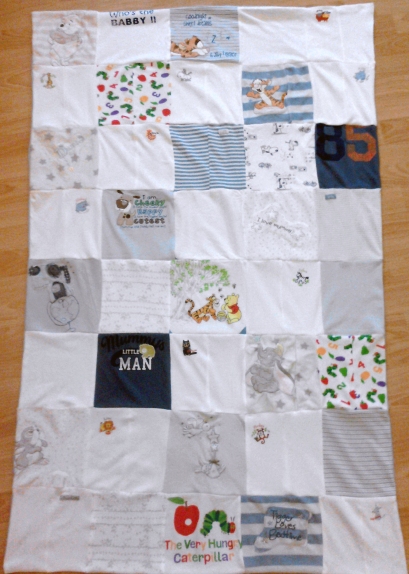 I think the blanket will be a long loved item. I have been told it is super cozy and used as a sofa comfort. There is even talk it might go abroad with one parent while the other is at home to keep them all close. We spread the project out over a few evenings, with a glass of wine and a beer or two. A great productive, fulfilling way to spend a evenings with my friend while the little one is in bed!
If you’re in the process of doing a project like this, or have already done one I’d love to hear how it went for you – please comment or get in touch if you have an experience to share!


Im following you _ not in a weird way lolz
Lol – thanks for the not stalker-ish follow, glad you liking my alternative to TV watching activities. X
I recently made a baby blanket for a friend and thought about using old baby clothes for another one when baba has grown out of stuff. She’s only just been born but has no doubt been given lots of cute stuff she won’t be able to wear for long. It’s great to see how one turned out – it looks so cute, I’ll give it a try. Were the baby grows hard to sew though? I imagine the stretchiness would make it tricky to sew straight.
Ace, it would be so great if you made one too, would be lush to see it if you do. I can imagine the blanket would be treasured by all involved. How cool if you had one from when you were a baby. The baby grows were ok to sew, we spread them out so we didn’t sew them to each other but thicker fabrics. The hardest bit to sew were the thick soft fluffy fleece fabrics, when it got really think.